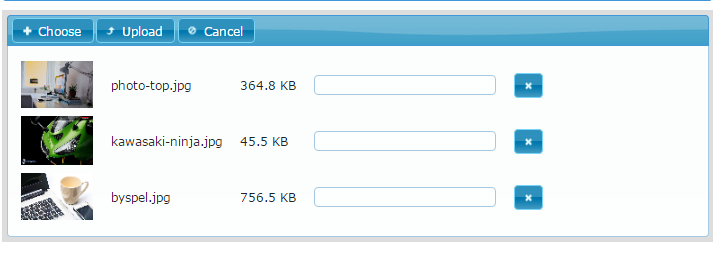
Hola a todos, sean bienvenidos a un nuevo artículo de la sección de Java en el cual realizaremos la implementación de un upload en PrimeFaces, nuestra página permitira subir varias imágenes y luego presionar un botón con el cual empezar la subida (upload de imagenes), así mismo cada imagen será renombrada al nombre original de esta seguido de la fecha y la hora del servidor, así que sin más empecemos:
Upload de Imágenes con PrimeFaces
Primero que todo debemos editar nuestro archivo web.xml y añadir un fltro así:
|
1
2 3 4 5 6 7 8 9 10 11 |
<filter>
</filter><filter -name>PrimeFaces FileUpload Filter</filter> <filter -class>org.primefaces.webapp.filter.FileUploadFilter</filter> <init -param> <param -name/>thresholdSize <param -value/>51200 </init> <init -param> <param -name/>uploadDirectory <param -value/>C:\tmp </init> |
Ahora vamos a crear nuestra vista, desde la cual haremos el llamado al Managed Bean encargado de realizar la subida de las imágenes, seguido lo declararemos para evitar errores.
🌟 ¡Visita Nuestra Tienda para Programadores! 🌟Descubre Códigos Fuente, Cursos, Software, Computadoras, Accesorios y Regalos Exclusivos. ¡Todo lo que necesitas para llevar tu programación al siguiente nivel!
|
1
2 3 4 5 6 7 8 9 10 11 12 13 14 15 16 17 18 19 20 |
< ?xml version=‘1.0’ encoding=‘UTF-8’?>
< !DOCTYPE html PUBLIC «-//W3C//DTD XHTML 1.0 Transitional//EN» «http://www.w3.org/TR/xhtml1/DTD/xhtml1-transitional.dtd»> <html xmlns=«http://www.w3.org/1999/xhtml» xmlns:ui=«http://xmlns.jcp.org/jsf/facelets» xmlns:p=«http://primefaces.org/ui» xmlns:h=«http://xmlns.jcp.org/jsf/html» xmlns:f=«http://xmlns.jcp.org/jsf/core»> <body> |
Aquí el ManagedBean:
|
1
2 3 4 5 6 7 8 9 10 11 12 13 14 15 16 17 18 19 20 21 22 23 24 25 26 27 28 29 30 31 32 33 34 35 36 37 38 39 40 41 42 43 44 45 46 47 48 49 50 51 52 53 54 55 |
package bean;
import java.io.File; @ManagedBean(name = «FileUploadManagedBean») private String destination = «D:\\tmp\»; public void upload(FileUploadEvent event) { } DateFormat dateFormat = new SimpleDateFormat(«yyyy–MM–dd HH_mm_ss«); |
Como pueden ver el método anterior se encarga de crear el archivo y renombrarlo, con esto tendríamos funcionando nuestro multi-upload tan solo ejecutalo y realiza pruebas, recuerda crear el directorio donde se almacenaran las imágenes.
Hasta pronto!.

Hola, muy bueno tu ejemplo, podrias hacer un tutorial en donde suba la imagen, la actualice en la pagina y luego la pueda guardar en la base de datos.
nota. ayudame porfa
muy bueno, pero como lo haces con varios archivos ala vez usando handleFileUpload de primefaces